Android Application Security [chapter 0x1] - Introduction to Frida
Hello world!
Hi everyone this will be an introduction on how to utilized dynamic analysis tools frida in Android. This post will go through on how to setup frida in rooted android and how to used it to make application bend to our will.
Setting Up The Environment
As I mentioned before, the android that we will be used is the rooted one, if you can get the real one, you can use a vm and set it up by yourself. I recommended to use genymotion to setup the vm, it’s easy and pretty straightforward to used(link).
NOTE: You have to created a personal account there, in order to operate it in your device and make sure you already have virtualbox installed.
Next is to prepare the frida tools in the android and your pc. Basically frida worked like client and server. First, you have to run the frida server inside the rooted android and connect to the running server using the frida client. Where to ge it?
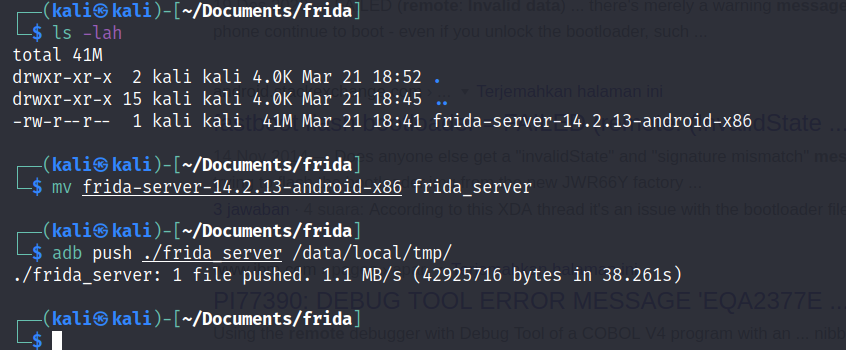
For frida client you can installed it by using pip utility and based on the picture aboved I install the client in my kali linux with 14-2.13 as the version.
To configure the server you have to download the binary from the official github repository(link). To play safe I’m just going to choose the binary version that matched with my frida client.
You might be wondering why I choose to download the x86 arch for the server well its because the android vm running in genymotion is running x86 arch(you can check your vm arch by running the adb command above)
Note: if you used a real device there’s a fat chance that it will be using ARM arch
Extract the zip file and put it into the “/data/local/tmp” folder in your rooted android, of course! you can used other directory as long as you remember it where.
Don’t forget to make the binary executable using chmod utility and execute it by running the following command:
~# ./frida_serverthe command will open a server and ready to be used, open another tab to test the setup by running:
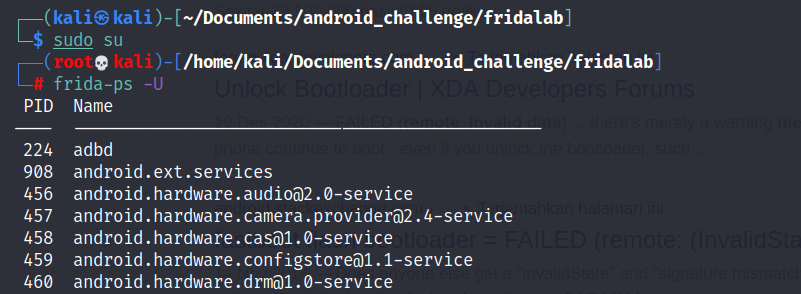
~# ./frida-ps -Uthe following command is to dump running processes that we able to hook in it using frida.
if the frida setup successfully it will show you the above result.
Finally, We are going to used the frida lab apk to used as ours practice app(link) and once you downloaded installed it in your rooted android
Challenge 1
Let’s jump right away into the first challenge!
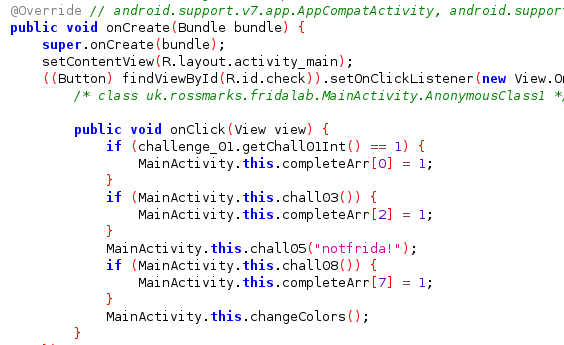
To get the above result you can use jadx-gui tools to reverse enginner and get the java source code of the application(link)
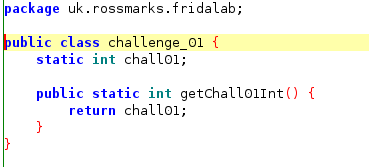
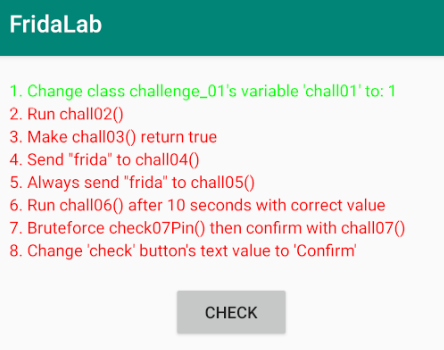
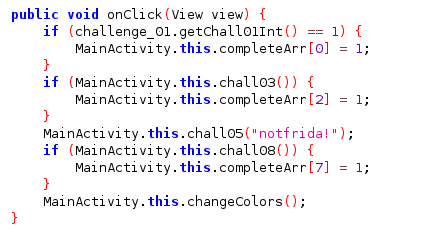
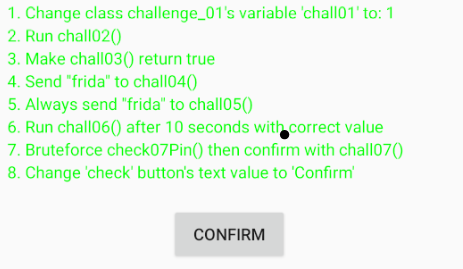
Let’s take a look at the source code, when you open the application in the vm you will represented with serveral list of instruction to finish the challenge and if you click the “check” button it will check if you complete the challenge or not, if yes it will turn green and if not it will turn red. By observing the code for challenge 1, after clicking the button, the application will check if function getChall01Int() in challenge_01 class is returning value 1.
We have to changed the return value into 1 to passed this challenge!
Tracing back to the class challenge_01 we can see that the function that we are looking for is returning a value from variable chall01. Thus, we need to access the variable and changed the value to 1 using frida.
how to do it?
simple!
frida run by following the javascript file that contain instruction what program that it need to tamper with.
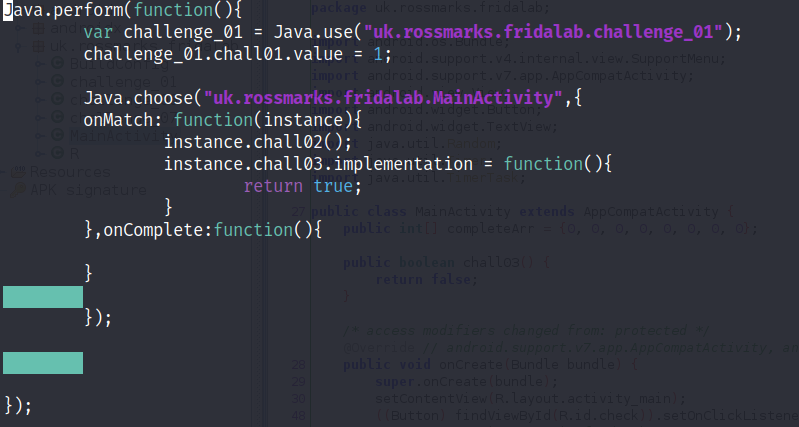
Create a .js file and fill it with the below source code:
this is one of many api functions that frida offer for us to used, in this challenge we are going to use two function:
-
Java.perform() that will ensure to attach frida in the current thread of running application and execute our javascript function to tamper the code in runtime. We are going to used this alot!
-
Java.use() to get a java class object and return a wrapper of javascript object so we can access class members. As you can see from the source code above we change the value of the static variable named chall01 into one.
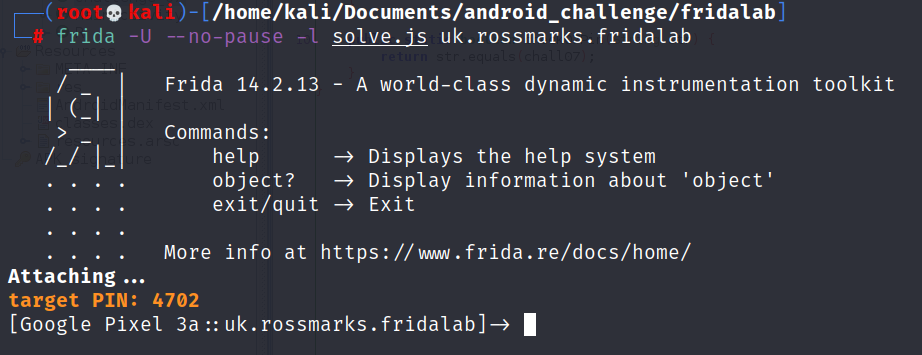
Now! you have to inject the javascript file to the application by running the above command.
-
-U is to connect frida client through USB cable
-
–no-pause to continue the execution of the program
-
-l define the script that we are going to inject
The “uk.rossmarks.fridalab” is the name of the application name from fridalab.
Clicking the button of “check” again will make the textview of challenge 1 turn green so that means we solve it, cool right?!
Challenge 2 & Challenge 3
Move on! to the second and third challenge.
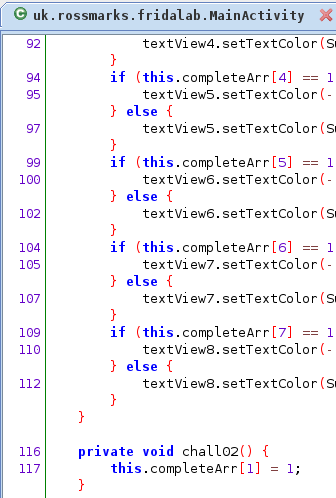
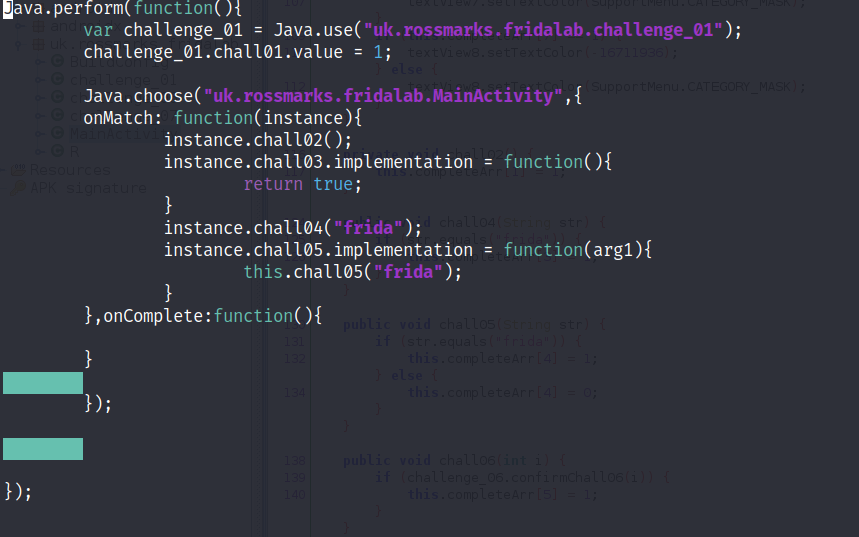
In the second challenge you need to run chall02() function using frida. If we look at the source code the corresponding function is located at MainActivity class and the login is pretty simple it flip the second index of the array in completeArr variable to 1.
While the third challenge demand you to tamper the return value of chall03() function into true.
In order to complete these two levels you can use the API Java.choose() function this will allow the frida to scan throughout the heap memory and find the class that we want to tamper and once frida find the correct class, we are able to access the actual code that is run in the application.
To tamper with implementation of function inside a class we can use the “implementation” method that offer by the instance parameter and shierly! we can assign it with a new function, in this case we overwrite the actual code and change it to always return true.
As you can see I merge the current script with previous javascript challenge. I like to do this in this way so I can have a clean result.
Challenge 4 & Challenge 5
The fourth and the fifth challenge have similar approach with two previous challenge respectively. In the fourth challenge we are instructed to call a function inside class but this time we need to send parameter with it, while the fifth challenge expected us to also tamper with the function chall05 but this time it is designed with hardcoded parameter.
Just like you predict! for fourth challenge, you can just do it excatly as the second with additional parameter, while in the fifth challenge, you tamper with the function parameter by calling the function itself with different parameter.
Challenge 6
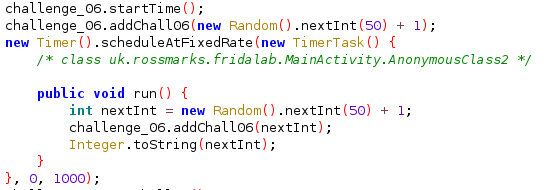
Out of all the challenge I think the six challenge is the most confusing one. Okay! lets go through the source code to get the big idea of how challenge work. You are expected to wait for ten second and you have to call the function chall06() with the correct parameter.
why we need to wait for ten second?
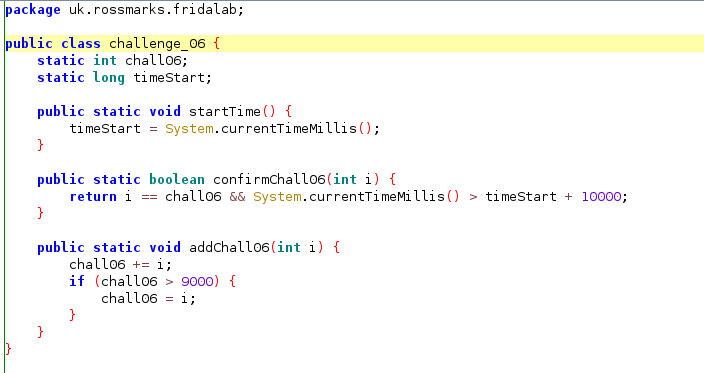
Take a look at the challenge_06 class, there is function named confirmChall06() that do comparison between the value of “i” which is the parameter that passed to the function and static variable chall06, along with comparison between value from System.currentTimeMillis that will return value of the current time in epoch and another static variable called timeStart add with value 10000.
The value of static variable timeStart is set when the function startTime() is called. This function is called in the MainActivity automatically when the user is open the application.
The value of static variable chall06 is set when the function addChall06() is called and when its called the program provide with random number as the parameter. This function is called in MainActivity automatically after the startTime() run.
We need to make sure this two conditions meet true to finish the six challenge the first comparison can be meet by calling the confirmChall06() function with the parameter with value from chall06 variable. But in order to meet the second condition we have to wait for ten second since if we call the confirmChall06() to0 early the System.currentTimeMillis value will be less than combined value between timeStart.
So how do we do it?
Frida offer function named setTimeout() this will help us to wait for ten second so our timing is right and when the time comes we will tamper the addChall06 function using the overload() api function in order to set the correct value consistenly.
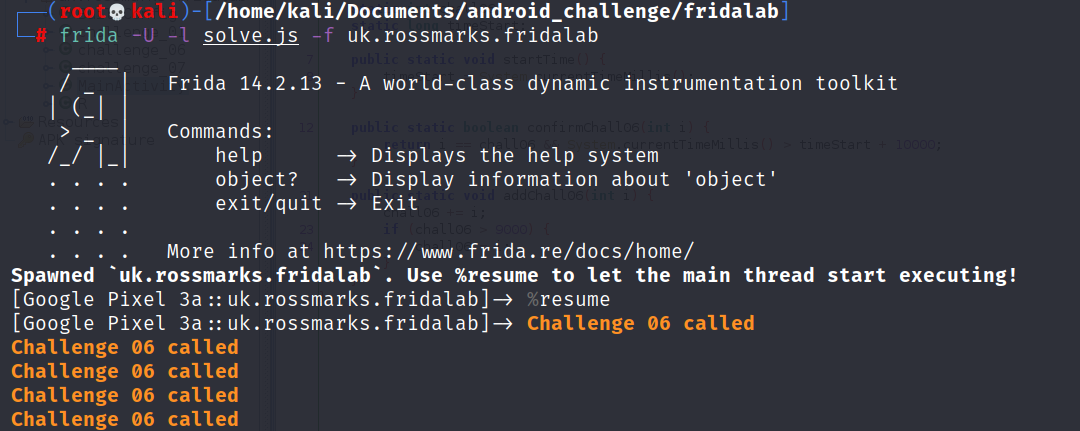
To run this script we cannot run it like the previous challenge while the app is still running, we need to run the script at the beginning of the application. To do this you can pass the following parameter like the above figure. This will spawn a new process for the application and inject our script from the start.
Remember you can combined this script with the previous one since it will cause confusion to the frida, so you have to put the source code above outside of the Java.perform().
Challenge 7
For challenge 7, you are expected to do a brute force to find out the correct PIN that set by the application. The application set the PIN at runtime when it finish running the six challenge and the value is a 4 digit random number.
To solve this challenge, you can use the above source code. All we have to do is to call check07Pin function from challenge_07 class and provide a number between 1000-9999 in loop until we get the right PIN.
Challenge 8
Last challenge, at last! It took me a while to finish this challenge because there is a minor modification on how frida handle java object in the newer version. I’m not gonna lie in this challenge, I used the code from this but there is a little tweak in it.
In this challenge you are told to change the text of the button from “check” to “Confirm”, to do that you can use the below source code.
In order to tamper Android UI you have to make sure that you are attached to the main thread, you can use Java.scheduleOnMainThread() and once you there you need to access the button object used by the application. But how? there so many of them! you can specify which button object you want to tamper by using the findViewById() method from the object and passed the number that represent UID of the UI element you check this in the R class file.
Finally to used this object you need to use Java.cast() function that get the properties of the app directly.
To make this even cooler I compile all of the script into one source code:
setTimeout(function(){
Java.perform(function(){
	var challenge_01 = Java.use("uk.rossmarks.fridalab.challenge_01");
	challenge_01.chall01.value = 1;

	var main;
	Java.choose("uk.rossmarks.fridalab.MainActivity",{
        onMatch: function(instance){
                instance.chall02();
		instance.chall03.implementation = function(){
			return true;
		}
		instance.chall04("frida");
		instance.chall05.implementation = function(arg1){
			this.chall05("frida");
		}

		main = instance;
		Java.scheduleOnMainThread(function(){
        	        var challenge_08 = Java.use("android.widget.Button")
              		var button = main.findViewById(2131165231)
			var check = Java.cast(button,challenge_08)
			var string = Java.use("java.lang.String");
			check.setText(string.$new("Confirm"))
	        });

        },onComplete:function(){

        }

	});

	var challenge_07 = Java.use("uk.rossmarks.fridalab.challenge_07");

        console.warn("target PIN:", challenge_07.chall07.value);
        for(var i = 9999; i>=1000; i--){
                if(challenge_07.check07Pin(i.toString())){
			main.chall07(i.toString());
			break;
		}

        }

});

},3000);

setTimeout(function(){
	Java.perform(function(){
		var challenge_06 = Java.use("uk.rossmarks.fridalab.challenge_06");
		challenge_06.addChall06.overload('int').implementation = function(arg0){
			console.log("click now!")
			Java.choose('uk.rossmarks.fridalab.MainActivity',{
				onMatch:function(instance){
					instance.chall06(challenge_06.chall06.value);
				},onComplete:function(){}
			});
		}
	})
},10000);
You saved into one file and run it like below:
~# frida -U -l solve.js -f uk.rossmarks.fridalabAfter you run this script, you have to immediately enter “%resume” so every function can take it places at the right time.
That’s all I hope you enjoy this post and see you in the next Android Application Security Topic.


